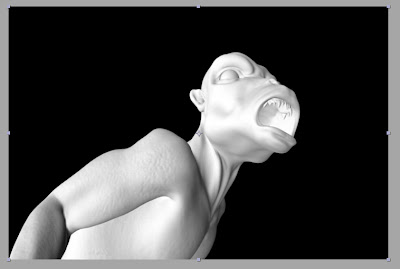
Start off with a normals render light this. I used Mental Ray's occlusion shader to render out the normals.
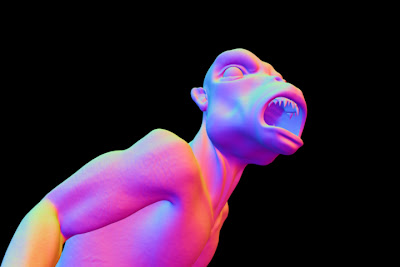
Drag it into a comp and apply a channel mixer effect to it. Set the channel mixer to "monochrome"
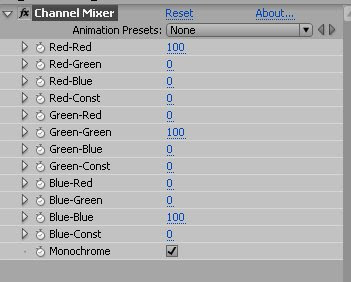
This makes it so that only the top four sliders effect the image. Basically, just take the "Red-" preface off of each slider label.
So what you get is a greyscale image based only on the red channel. In the normals pass, Red is the normals value along the X axis, where the more a normal faces the positive X direction, the more red it gets. (note: the x axis can be either the world x or the camera x, depending on the type of normals pass. This pass was done in world space.).
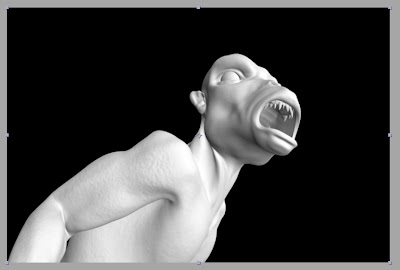
If we turn the red channel down to 0 and the green channel up to 100, we get the Y axis normals, like this.
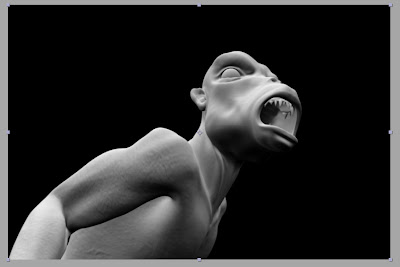
and the Z axis is of course, blue.
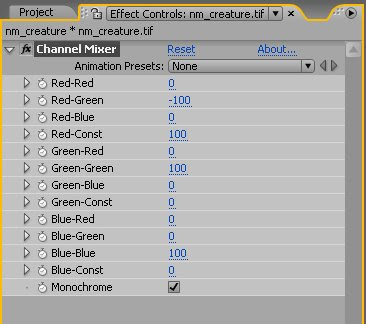
Now, if we set a channel to the negative, we have to compensate with the "constant" channel. Here, we see a negative green channel with compensation.
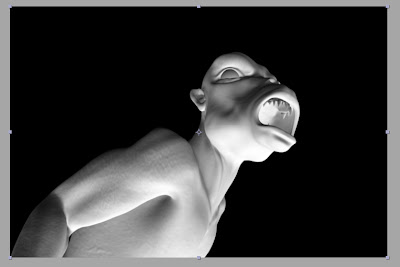
See how it looks like it's lit from underneath, instead of from above.
So let's play with some sliders. Say I want to create a bit of a side light/rim light. Well, thinking in terms of xyz, I would want the light to come from a little bit behind, so I set the blue (Z) to a negative value. I want the light to be a bit above and to the screen right of the character, so I set the green(Y) and red(X) to a positive value. I don't really need to use the constant slider, because the red and green channels are doing the job of compensating here.
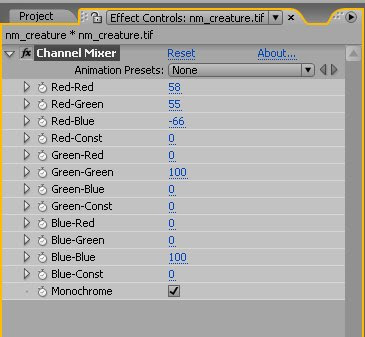
So let's say this is what I want the light to look like.
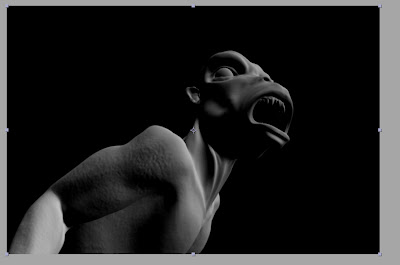
Now I bring in a color pass and multiply it over the normals pass.

and there you go. Basically you have a diffuse render now.
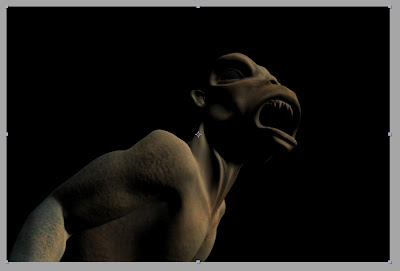
This method has been extremely helpful on a lot of jobs I've done. I've even done some jobs using only normals passes for lighting, and just rendering out shadow and occlusion passes once I'd set up the "lights" how I wanted them. However, there are a few areas that you can get caught up if you're not careful. One of the biggest is premultiplied alphas. The best workaround I've found is to ignore the alphas for the main passes (color, normals, occlusion) and then precomp them together, applying an alpha to the precomp via track matte or the set matte effect.
I hope this helps you out. If you think of any other ways to use the normals, or of a better way to get the same effect, drop me a line or a comment. And if there are any techniques you'd like to see, let me know and I'll see if I can come up with something.
No comments:
Post a Comment